How to Seal Attic Air Leaks
Your heating system works overtime through Colorado’s bitter winters, yet rooms remain stubbornly frigid. Summer arrives, and despite the air conditioner’s constant hum, specific spaces remain uncooled.
The culprit isn’t your HVAC system. Hidden above your living space, attic air leaks silently reduce comfort and increase energy bills by 20 to 30 percent annually. These invisible gaps allow warm air to escape and cold air to infiltrate, costing Denver-area homeowners hundreds of dollars each year.
Most homeowners assume adding more insulation solves temperature problems. That approach overlooks a fundamental principle: attic insulation performs optimally only after air leaks are eliminated. Without proper air sealing, even premium fiberglass insulation is compromised when air currents carry moisture, reducing thermal resistance. Colorado’s extreme temperature swings and low humidity create unique challenges that demand tailored strategies.
Understanding how to seal attic air leaks transforms your home’s energy performance. The process involves systematically identifying problem areas, selecting appropriate sealing materials, and methodically applying techniques.
Common Attic Air Leak Locations
Understanding where air leaks occur helps you prioritize sealing efforts for maximum energy savings. Your attic hatch or pull-down stairs likely creates one of the largest thermal bypasses in your home, allowing hundreds of cubic feet of conditioned air to escape each day.
Most attic access points lack proper weatherstripping or insulation, creating a direct pathway between your living space and the unconditioned attic. You can lose as much energy through an unsealed attic access door as through a window left open two inches year-round.
Recessed lighting fixtures represent another significant source of energy waste that often goes unnoticed. Standard recessed lights create holes directly through your ceiling drywall and attic insulation, allowing hot air to rise straight into the attic during winter. Each unsealed can light acts like a chimney, continuously pulling conditioned air out of your home. If you have older light fixtures, they’re likely not rated for insulation contact, which means installers had to leave gaps around them that now constantly leak air.
Hidden Penetrations Cost You Money
Plumbing and electrical penetrations create continuous air pathways that drain energy efficiency. Every plumbing pipe, electrical wire, and duct that passes through your attic floor requires proper sealing, yet builders often leave these gaps unsealed.
Your bathroom exhaust fans, kitchen vents, and HVAC ductwork all create potential leak points. Masonry chimneys and water heater flue pipes present large openings that often lack an air seal, allowing significant warm air to escape. Dropped soffits over kitchen cabinets create hidden cavities with gaps that allow warm air to spill into unconditioned spaces above.
Start your sealing project by inspecting these high-impact areas first, as they typically account for 60-70% of total attic air leakage in Colorado homes.
DIY Attic Air Sealing Techniques
Learning how to seal attic air leaks yourself can deliver immediate comfort improvements. Your first step is to identify leak locations by using a smoke pencil or incense stick on a windy day and watching for smoke movement near suspected gaps.
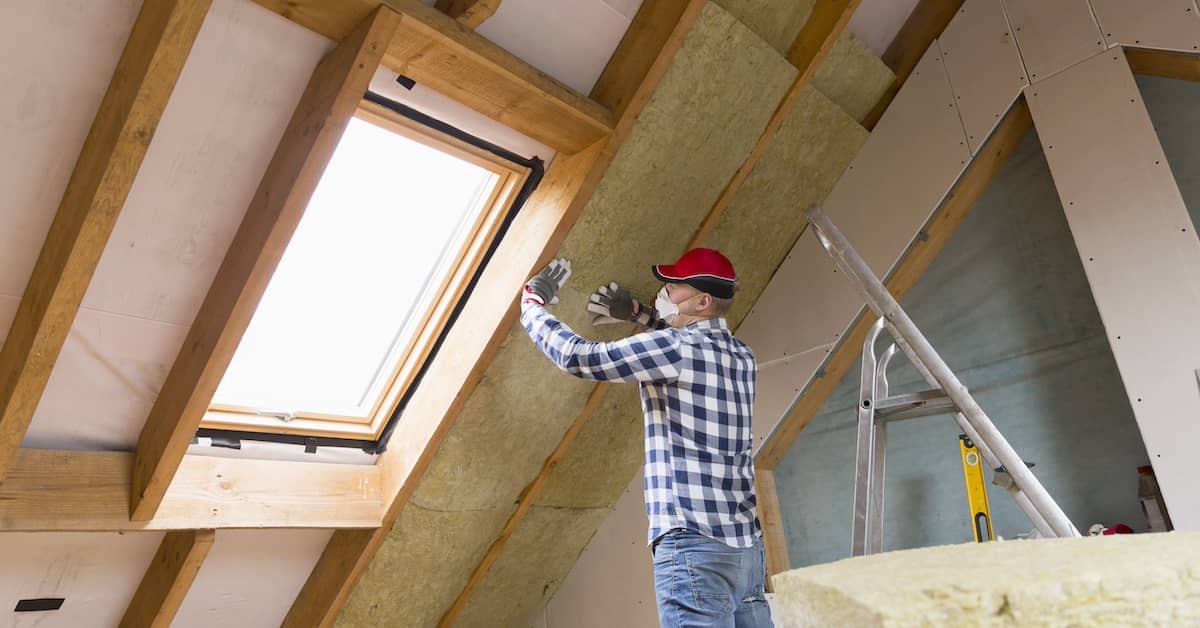
An infrared thermometer helps detect temperature differences that indicate air movement, showing exactly where cold spots exist during cold weather. These simple diagnostic tools, priced under $50 combined, reveal issues that visual inspection alone would miss. Before you begin, wear an OSHA-approved particulate respirator and safety glasses, especially if you encounter dirty insulation or disturb vermiculite insulation.
Weatherstripping around your attic access hatch provides one of the easiest high-impact improvements. Apply adhesive-backed foam tape along the entire perimeter of your attic door to create a compression seal when closed. Add rigid foam insulation board to the back of the hatch and secure it with construction adhesive to increase the R-value directly above your living space. This 30-minute project costs $20-40 and can reduce heat loss through your attic access by 80%.
Sealing Penetrations Stops Air Movement
Expanding foam sealant works perfectly for gaps around plumbing pipes, electrical wires, and ducts that pass through your attic floor. Apply foam carefully around plumbing penetrations, filling the entire cavity without over-expanding into living spaces below.
Use fire-rated foam around any heat-producing penetrations, such as recessed lighting or furnace flues, to prevent a fire hazard. For electrical junction boxes and small wire penetrations, apply a bead of acrylic latex caulk around the entire perimeter where the fixture meets the ceiling drywall. If your home has older tube wiring, consult a licensed electrician before sealing around these electrical components.
Install foam gaskets behind recessed light fixtures rated for insulation contact to create an airtight seal between the fixture and the ceiling. For fixtures not rated for insulation contact, build an insulation dam using rigid foam board or lightweight aluminum flashing to maintain required clearances while still sealing air leaks. Focus your efforts on the most significant gaps first, as sealing just five major penetrations can reduce total air leakage by 30-40%.
Foam Sealant vs. Caulk
Understanding when to use foam sealant versus caulk is essential to sealing attic air leaks effectively. Expanding foam works best for gaps larger than half an inch, irregular cavities, and penetrations where you need the material to fill complex spaces.
Spray foam expands to create an airtight seal that conforms to odd shapes around plumbing vents, electrical conduit, and HVAC system ductwork. You’ll find it particularly effective at bathtub and shower drain penetrations, where gaps can exceed 2 inches. Spray foam insulation also delivers superior air-sealing performance because itinsulates and seals in a single application.
Caulk provides superior control for minor cracks and applications requiring precise placement. Use acrylic latex caulk for gaps under half an inch, especially around electrical boxes, small wire penetrations, and along top plates where walls meet the attic floor. Caulk doesn’t expand, so you maintain complete control over application depth.
Match Materials to Applications
Fire-rated products become mandatory around any heat-producing penetrations in your attic. Apply fire-rated caulk or foam around masonry chimneys, water heater flue pipes, and recessed lighting fixtures to maintain proper fire safety codes and prevent fire hazards.
Standard expanding foam can ignite when exposed to high temperatures, creating serious safety hazards. Your local building codes typically require fire-rated sealants within three feet of any heat source. Use metal flashing around chimneys to make a metal dam that separates combustion appliances from insulation materials.
Consider these guidelines when selecting sealing materials:
- Use expanding foam for large, irregular gaps and plumbing penetrations.
- Apply caulk for small cracks and electrical work.
- Choose fire-rated products near heat sources.
- Install metal flashing around chimney chases for proper clearance.
The best type of insulation for your home depends on your specific air sealing needs and existing attic conditions.
Professional Energy Audits Reveal Hidden Leaks
Even a thorough DIY inspection can’t identify hidden air leaks that drain your home’s energy efficiency. Professional energy auditors use blower door tests that depressurize your entire home, creating measurable pressure differentials that expose concealed leak pathways invisible to the naked eye.
The test quantifies your home’s total air leakage rate in cubic feet per minute, providing concrete data on how much conditioned air you’re losing. Blower door testing creates conditions equivalent to a 20 mph wind, allowing auditors to measure exactly where your home loses energy.
Infrared cameras detect temperature variations behind walls and around attic penetrations that are not visible to the naked eye. These thermal imaging devices show exactly where cold air infiltrates during winter or where incredible air escapes during summer. Your auditor can identify issues such as missing fiberglass insulation, unsealed ductwork, and hidden gaps around masonry chimneys or plumbing vents.
Data Drives Effective Solutions
Professional audits provide prioritized recommendations based on measured energy loss rather than guesswork. Your auditor calculates potential savings for each improvement, helping you focus resources on repairs that deliver the highest return on investment.
The detailed report includes specific leak locations, estimated costs, and projected annual savings for each upgrade. Many Colorado utility companies offer rebates that cover 50-75% of audit costs. Xcel Energy customers pay just $135 for a comprehensive audit after the 60% rebate.
A professional assessment also identifies indoor air pollutants that enter through unsealed gaps. Filtering dusty air that enters through attic leaks improves indoor air quality throughout your home. The combustion appliance testing performed during audits ensures your furnace and water heater vent properly, preventing carbon monoxide from accumulating after you seal air leaks.
Proper Attic Ventilation
Is air sealing the attic worth it? Absolutely, but it is crucial to know how to seal attic air leaks, as proper attic ventilation must work alongside your sealing efforts to prevent moisture problems and dangerous ice dams.
Proper ventilation prevents ice dams that form when warm air escapes into an uninsulated attic, melting snow on the roof and causing it to refreeze at the eaves. By sealing air leaks between your living space and attic while maintaining proper ventilation, you create the ideal thermal barrier.
Never seal your soffit vents, ridge vents, or gable vents when air sealing. Your goal is to prevent conditioned air from escaping your living space, not to block the attic ventilation system that protects your roof deck from moisture damage.
What Is the Best Product to Air Seal an Attic?
The best product depends on the specific application and gap size. Here’s what works for different situations:
- Spray foam insulation provides excellent air sealing for irregular gaps and rim joists. Closed-cell spray foam delivers R6 per inch and creates an impermeable barrier.
- Expanding foam in cans works well for DIY sealing around pipes, wires, and more minor penetrations. Choose fire-rated versions near heat sources.
- Acrylic latex caulk handles small cracks and gaps under half an inch with lasting flexibility.
- Rigid foam board creates excellent barriers for attic hatches and insulation dams around recessed lights.
- Metal flashing and high-temperature caulk are used for chimney and flue clearances where fire codes require non-combustible materials.
- Fiberglass batt insulation and unfaced fiberglass insulation can cover sealed penetrations, but blown insulation and cellulose insulation only slow air movement rather than stopping it completely.
For comprehensive air sealing, professional spray foam installation delivers the best long-term results. The material expands to fill gaps that DIY methods often miss.
Smart Investment Economics and Value
Understanding the financial impact of sealing attic air leaks helps you make informed decisions about your home’s energy efficiency.
Typical home air sealing costs range from $300 to $900, depending on your home’s size and complexity. A 2,000-square-foot home with standard attic access, recessed lighting, and plumbing penetrations typically costs $600-900 for professional sealing. DIY projects cost $100-300 for materials but require 8-12 hours of labor and may miss hidden leak points.
Average energy savings of 15-20% on heating and cooling bills make attic air sealing one of the highest-return efficiency improvements available. Colorado homeowners spending $200 per month on utilities can save $30-40 per month on energy bills after proper air sealing. That adds up to $360-480 in annual savings, with return on investment typically arriving within 2-4 years.
Comfort Improvements Add Value
Improved home comfort eliminates drafts and temperature fluctuations that make certain rooms uncomfortable, regardless of thermostat settings. You’ll notice more consistent temperatures across floors, reduced dust infiltration, and quieter living spaces once air pathways are closed.
Professional air sealing, combined with proper insulation, can increase a home’s resale value by 3-5%, as energy-efficient homes command premium prices in Colorado’s market. Proper attic insulation provides numerous benefits beyond energy savings, including extended HVAC equipment life and improved indoor air quality.
Your Path to Lasting Comfort
Sealing attic air leaks transforms your home from an energy-draining liability into an efficient sanctuary. The attic floor is your primary defense against thermal loss, and the strategic application of spray foam and weatherstripping delivers measurable returns within 24 months.
Whether you tackle accessible gaps yourself or engage professionals for comprehensive air sealing, each closed pathway between conditioned spaces and your attic insulation reduces the workload on your HVAC system and eliminates temperature inconsistencies.
Professional energy audits reveal what visual inspections miss, quantifying exactly where warm air escapes and providing the data-driven roadmap you need for maximum impact. Colorado’s extreme climate demands proactive solutions, and proper attic air sealing offers the foundation for every subsequent efficiency upgrade.
Ready to stop guessing and start saving? A professional home energy audit identifies your specific leak points and prioritizes improvements based on measurable impact. REenergizeCO’s BPI-certified auditors use blower door testing and thermal imaging to find every hidden air leak.
Schedule your home energy audit today:
- Denver area: (303) 227-1000
- Fort Collins area: (970) 323-3191
Most Xcel Energy customers pay just $135 after the 60% utility rebate. You’ll receive a detailed report with prioritized recommendations, estimated costs, and projected savings for every improvement. Xcel Energy rebates for insulation and air sealing can significantly reduce your upfront costs, with some homeowners qualifying for $1,200 or more in combined incentives.
Share on:
Get In Touch
By submitting this form, you consent to receive emails from REenergizeCO. You can unsubscribe at any time by clicking the link in the footer of our emails. Emails are serviced by Constant Contact.
Related Posts

What E15 Gas Means for Colorado Drivers in 2026
Articles on Energy SavingGas prices are climbing again in Colorado, and a new fuel is showing up at the pump right as your wallet f…
Read More »
How the Colorado Clean Energy Fund ClearPath Loan Works
Articles on Energy SavingMost Colorado homeowners discover ClearPath the same way: a contractor mentions it near the end of an esti…
Read More »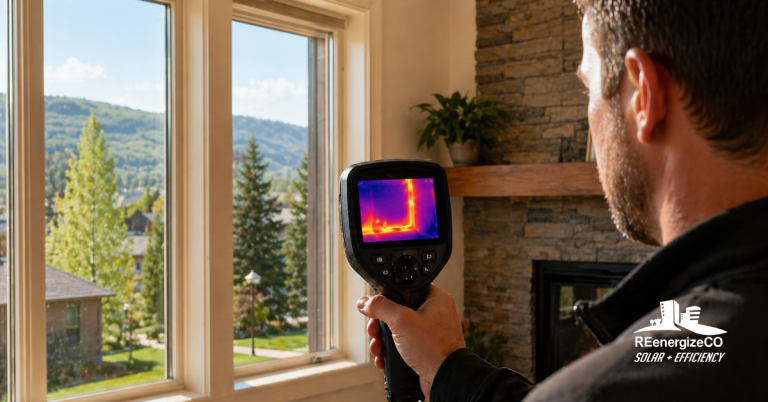
Is Your Home Wasting Energy Without You Knowing?
Articles on Energy SavingYour energy bills keep climbing, but your habits haven’t changed. You set the thermostat the same way, you…
Read More »